Step into spooky season with a twist of eerie glamour—mummy nail art is your ticket to turning fingertips into haunting little masterpieces. Think playful bandage swirls, creepy-cute faces, and even googly eyes staring back.
Whether you’re drawn to subtle wraps or dramatic detail, there’s a bewitching look for every mood and skill level. Perfect for costume parties or just October vibes, these designs scream Halloween without being over-the-top. Dare to get wrapped? Dive into our top picks for the ultimate creepy-chic manicure.
What is Mummy Nail Art?
Mummy nail art is a Halloween nail design that mimics the look of cartoonish or realistic ancient mummies using white, nude, or beige as a base, with crisscrossed lines (to simulate wrapped gauze or bandages), and pairs of bright, spooky eyes peeking out. It’s popular for being eye-catching, surprisingly easy to DIY, and endlessly customizable.
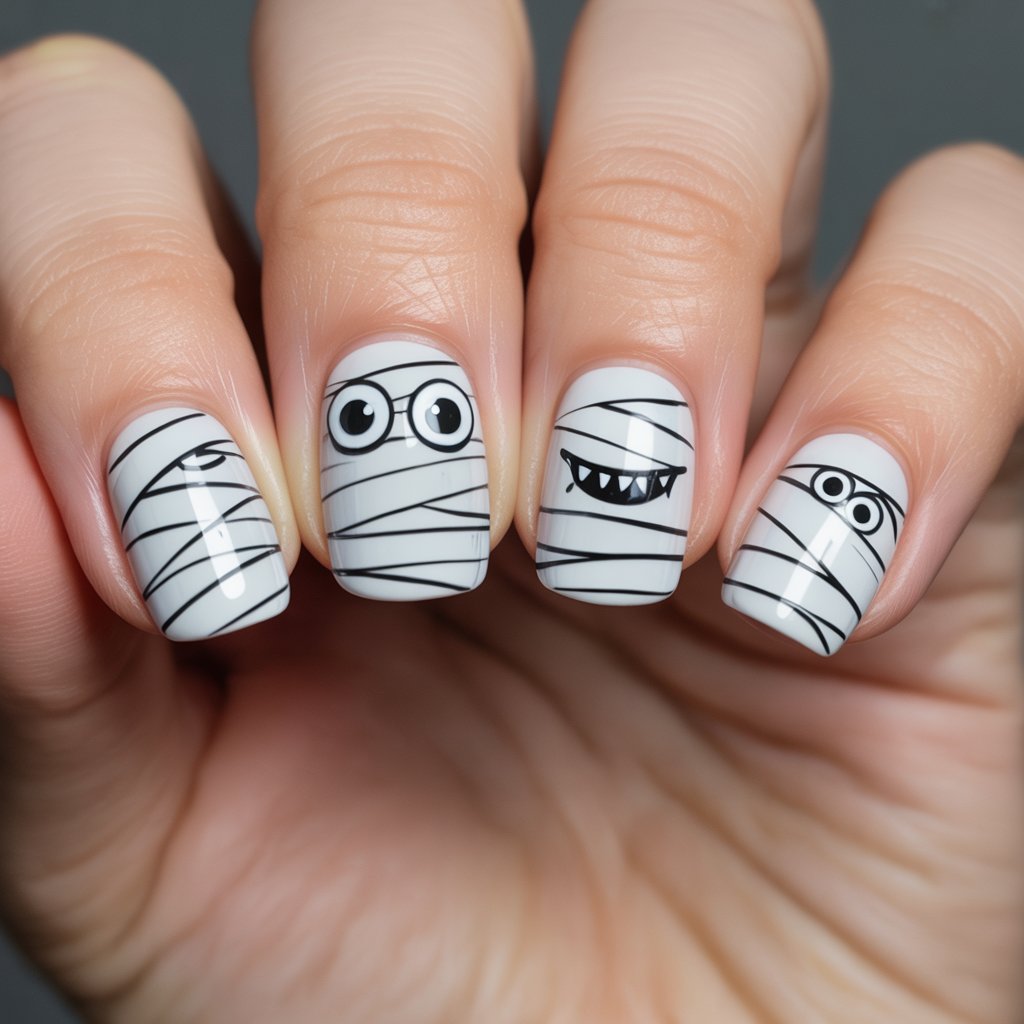
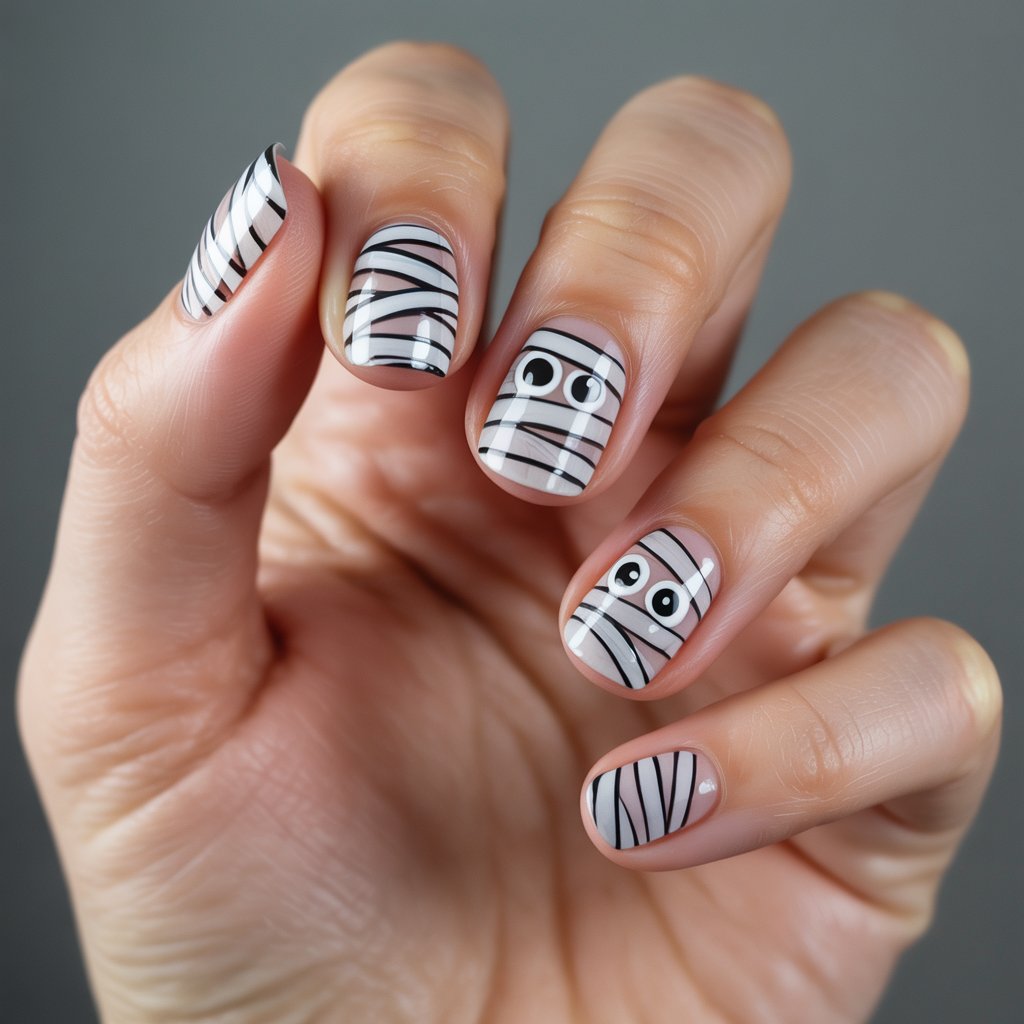
1. Classic White Mummy Nails
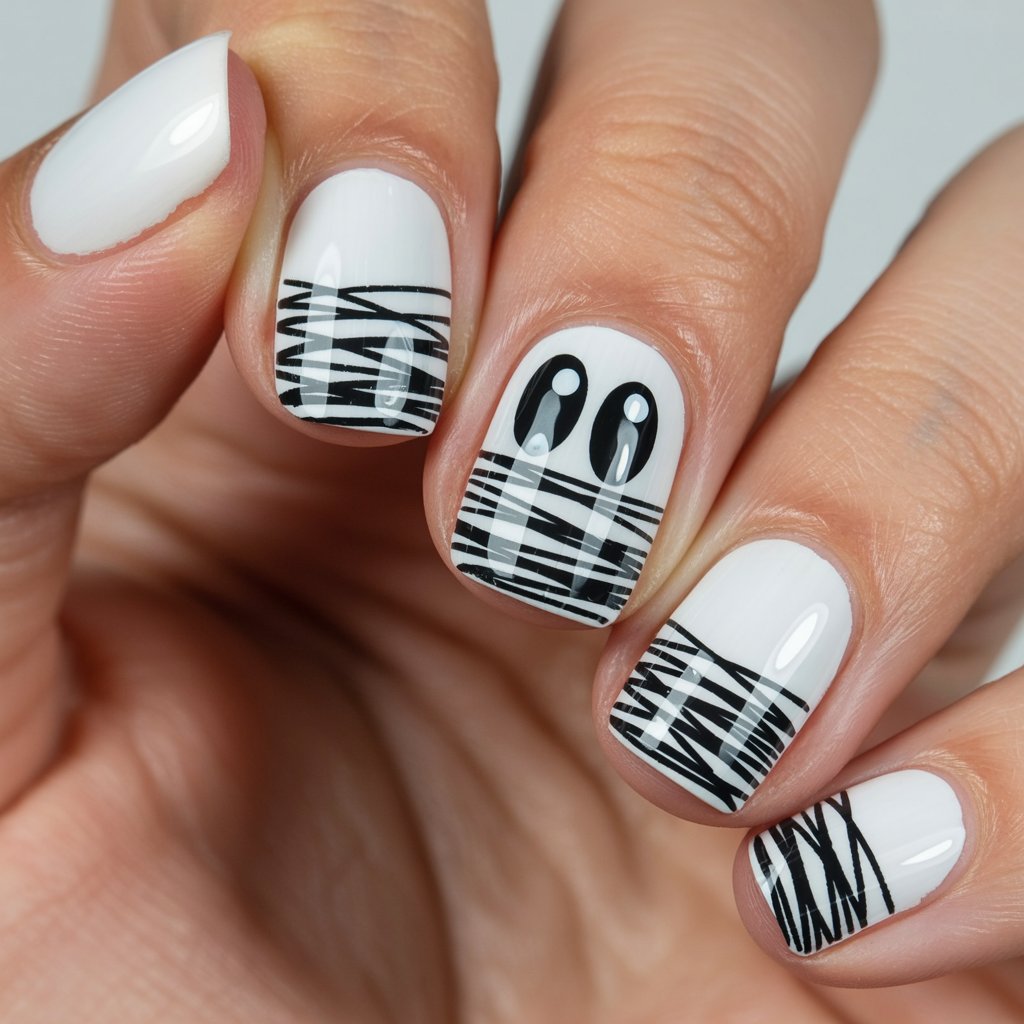
Begin with a crisp white base coat as your canvas. Next, grab a fine-tipped brush or black striping polish and sketch chaotic, overlapping lines to mimic tattered mummy wraps. Imperfect strokes are key—think messy, not meticulous.
For a playful twist, dot on a pair of wide, black eyes, then top them with tiny white pupils for that quirky, animated stare. This timeless, spooky-cute design balances simplicity with charm—ideal whether you’re just starting out or a seasoned nail art pro.

2. Nude and Beige Mummy Nails
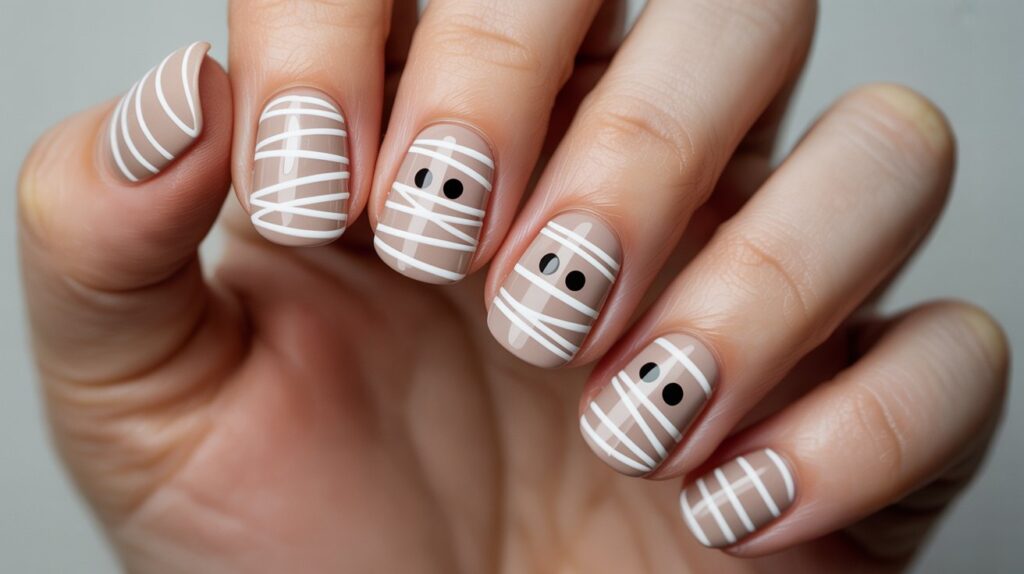
For a more refined, understated twist on mummy nail art, start with a nude or beige gel polish as your base it sets the tone with a soft, neutral backdrop.
Then, using white polish, sketch uneven horizontal lines to mimic the look of loosely wrapped gauze. The beauty lies in the imperfection.
Finally, dot on two tiny black eyes to bring your subtle mummy to life. This chic take blends spooky charm with minimalist elegance, perfect for a polished Halloween vibe.
3. Girly Pink Mummy Nails
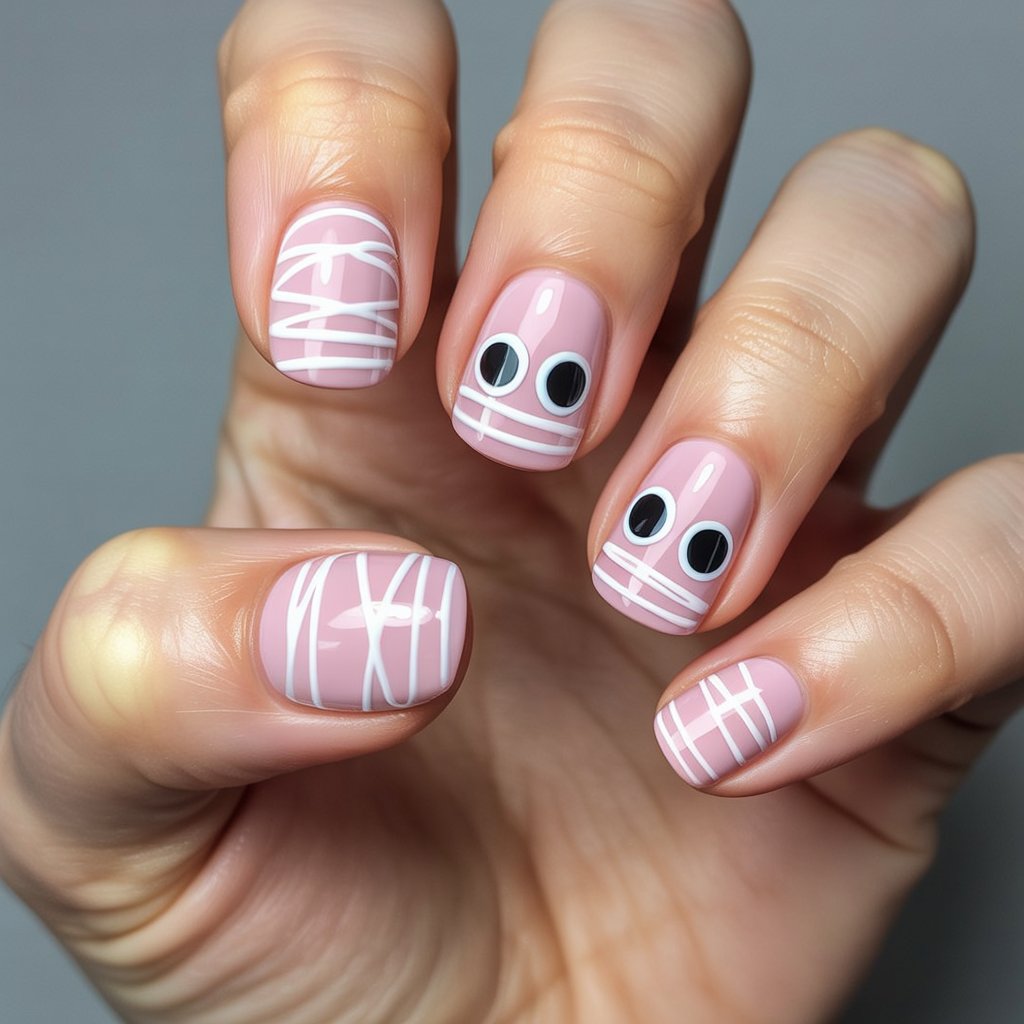
For a chic and playful take on Halloween nails, begin with a soft pastel pink base that sets a trendy tone. Layer on delicate white lines to mimic mummy wraps, creating subtle texture. Then, dot on tiny black eyes peeking through for a whimsical effect.
To top it off, add a dainty little bow above the eyes—sweet, sassy, and selfie-ready. This look strikes the perfect balance between spooky and stylish, making it a fabulous pick for fashion-forward Halloween lovers.
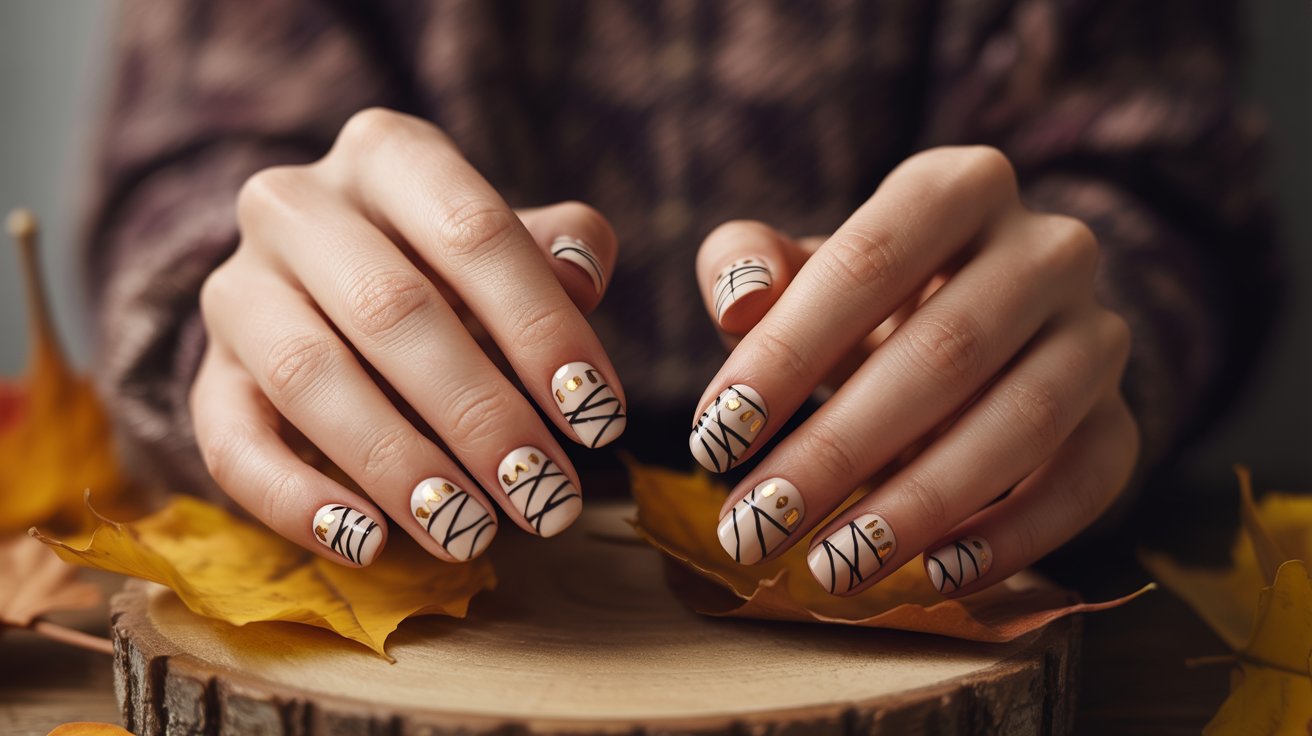
4. Minimalist Mummy Accent Nail
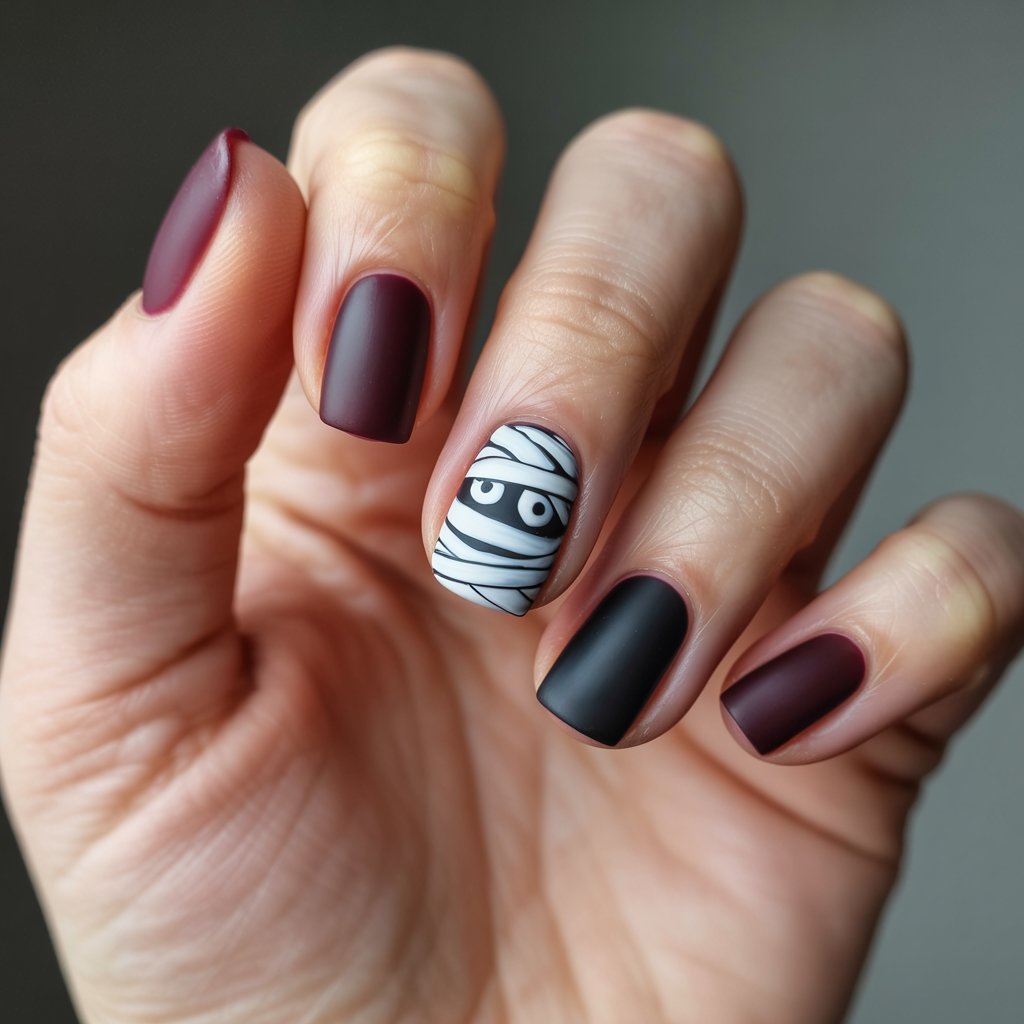
If subtle sophistication is more your vibe, consider crafting a single standout mummy design—ideally on the ring finger—for a touch of spooky charm.
Surround it with moody, complementary tones like deep plum, matte charcoal, or inky black on the remaining nails. This contrast not only highlights the themed accent but also keeps your manicure polished and refined.
The balance of playful detail and understated elegance creates a Halloween nail look that feels both modern and mysteriously stylish without going overboard.
5. Glow in the Dark Mummy Nails
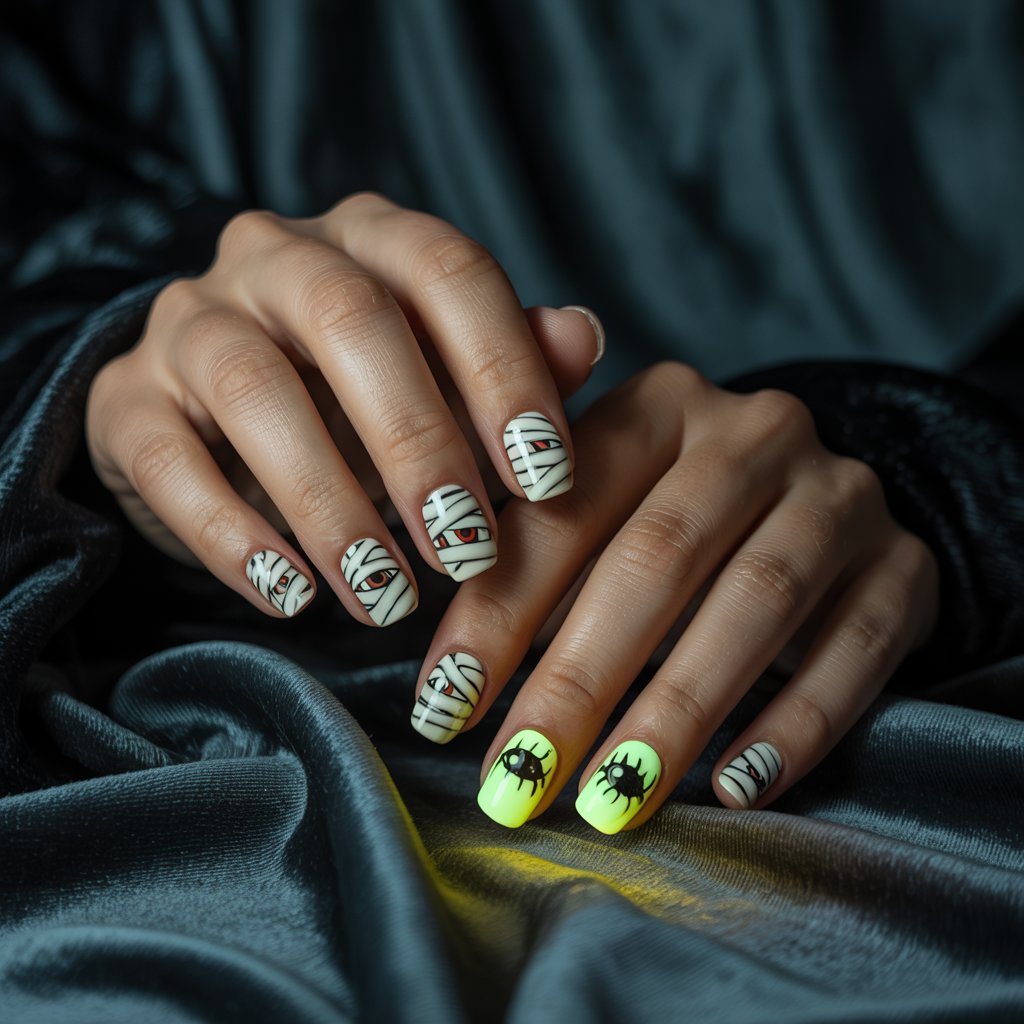
Transform your Halloween vibe with a spine-chilling twist opt for glow-in-the-dark polish on your mummy wraps or spooky eyes for a hauntingly surreal glow.
As the lights dim, the eerie shimmer brings your nails to life, casting a ghoulish charm that’s impossible to ignore.
Whether you’re roaming the streets for candy or dancing under flickering party lights, this ghostly touch adds a mesmerizing flair. It’s playful, dramatic, and just the right amount of creepy for a night full of thrills.
6. 3D Mummy Nail Art
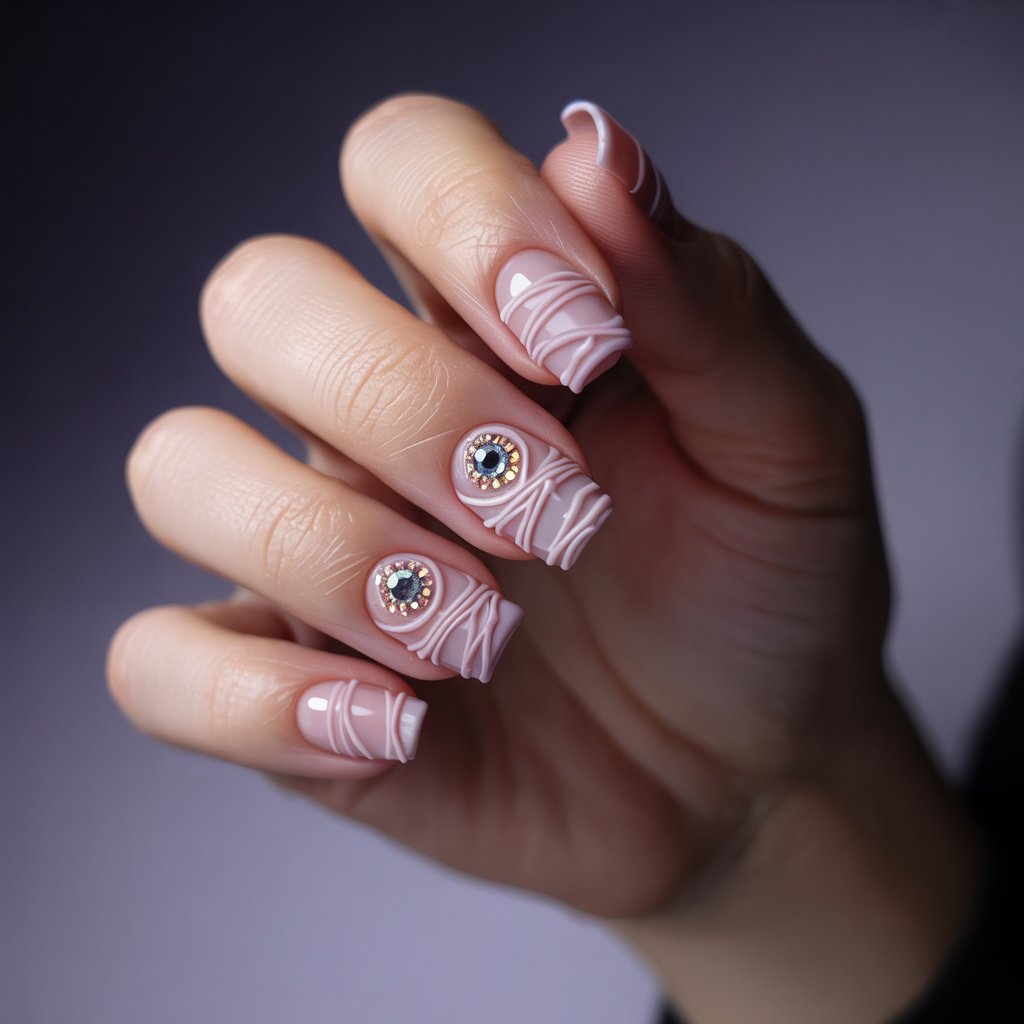
For nail enthusiasts craving texture and dimension, this eerie-chic idea is a must-try. Elevate your look with sculpted 3D gel wraps that mimic unraveling bandages, or go bolder by adding glinting rhinestone “eyes” peeking through the layers.
Paint on delicate, raised gel lines to give the illusion of wrapped gauze, then embed small, shimmering gems as haunting little pupils. The result? A visually striking, tactile masterpiece that’s equal parts spooky, stylish, and guaranteed to turn heads this Halloween season.
7. Cartoon Mummy Faces
Why settle for spooky when you can go silly, too? Add some charm to your mummy nail art by sketching a quirky little face—think googly eyes, a mischievous grin with tiny vampire fangs, or exaggerated eyebrows full of attitude.
Want to get even more creative? Toss in a speech bubble with something hilarious or unexpected. This twist turns your Halloween look from just eerie to downright adorable, mixing fright with delight in the most unexpected way.
8. Glitter Mummy Nails
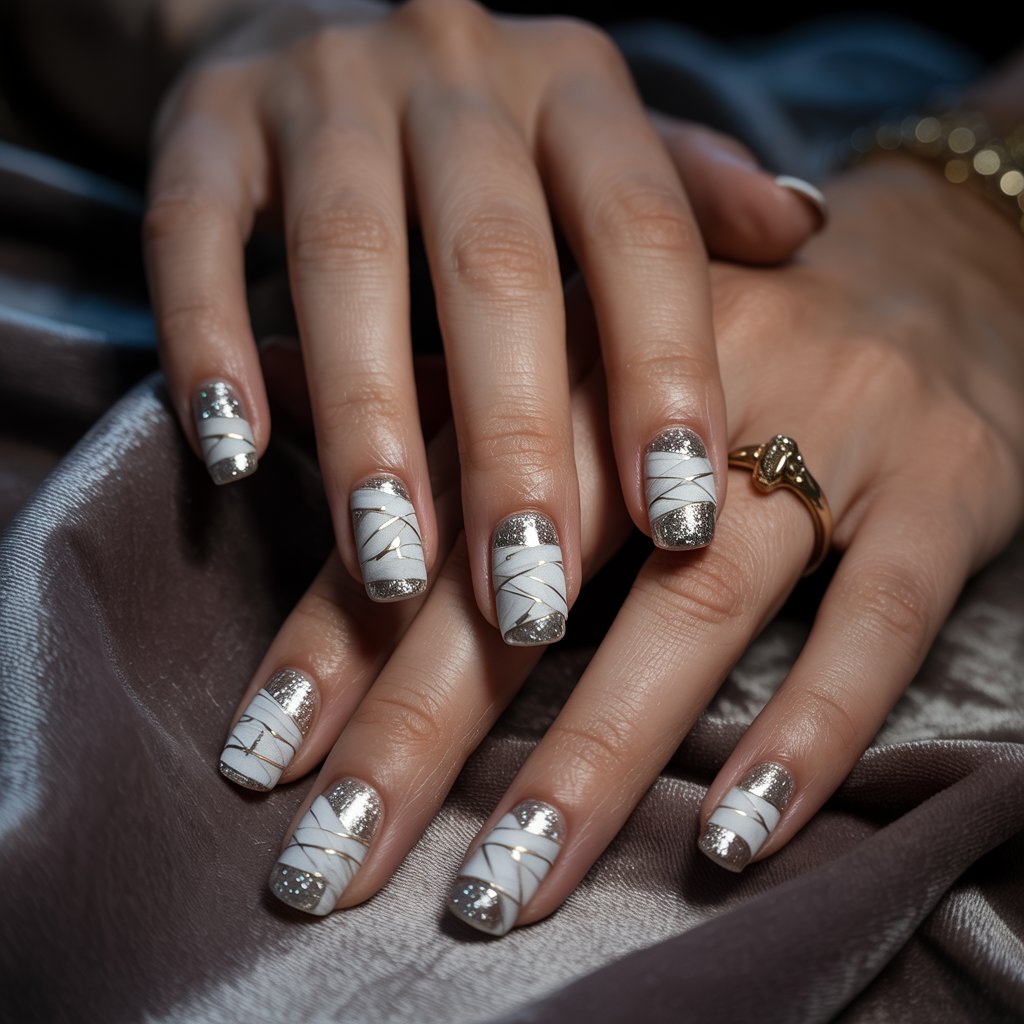
Add a touch of eerie elegance to your mummy nails by embellishing select wraps with dazzling glitter polish or shimmering metallic gel liner. The sparkle catches the light in the most hauntingly beautiful way, turning basic bandages into eye-catching art.
This simple yet striking detail transforms your Halloween manicure from spooky to spellbinding. Whether you’re headed to a costume party or just embracing the season’s spirit, this glam-meets-ghoul twist ensures your fingertips leave a wickedly stylish impression.
9. Bloodshot Mummy Eyes
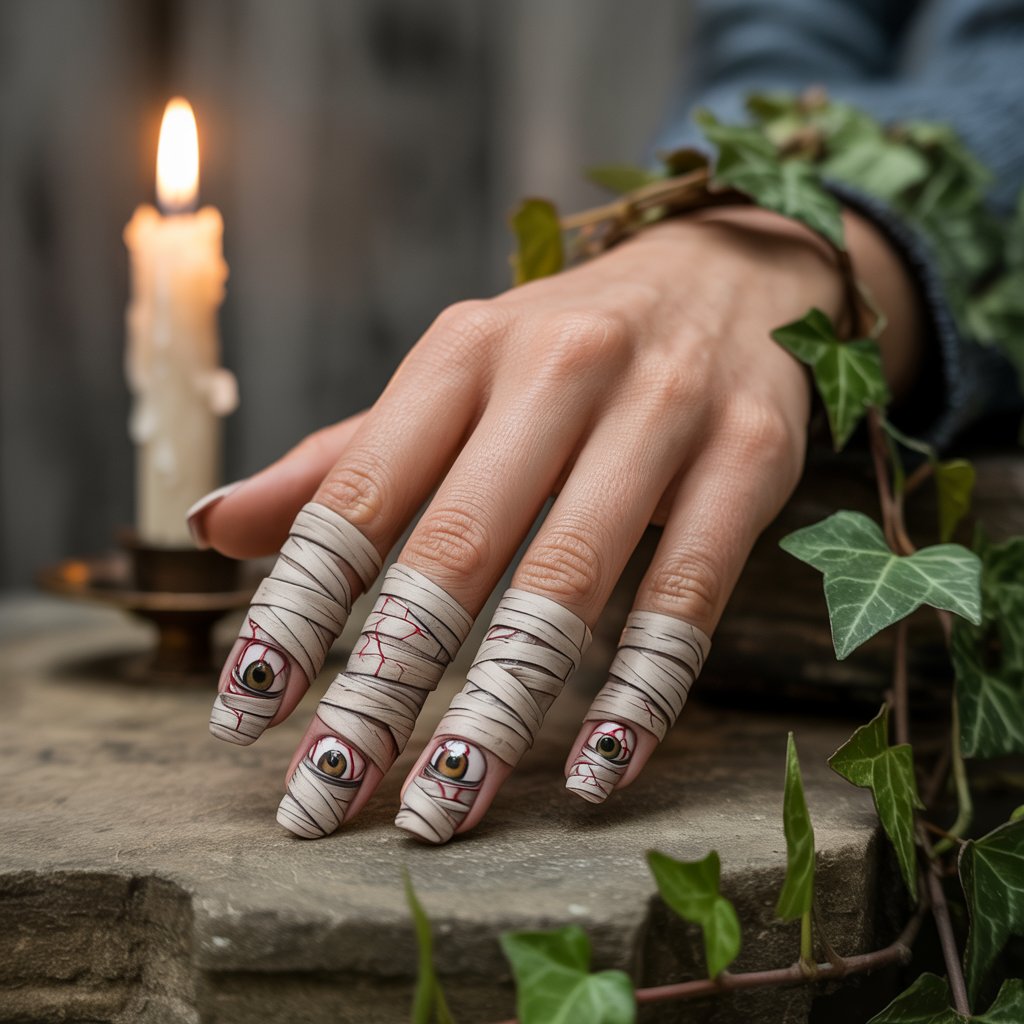
Channel a vintage horror flick with a spine-chilling twist on your mummy nail design—paint eerie, bloodshot eyes peeking through the wraps, complete with delicate red veins for that haunting, sleep-deprived stare.
This subtle yet sinister detail breathes life—or death—into your look, conjuring up visions of dusty tombs and ancient curses. Perfect for spooky season, this creepy accent turns your fingertips into miniature monster movie stars. Who knew something so small could look so terrifyingly alive? Dare to disturb the undead.
10. Short Mummy Nails
Short nails deserve just as much spooky spotlight! Even without long tips, you can conjure up the full mummy magic.
Try placing the “eyes” slightly off-center—it instantly adds a playful, eerie twist. Keep the wrap lines intentionally uneven and chaotic to amplify that unraveling, ancient look.
The beauty of this design lies in its imperfection, making each nail feel like its own tiny cryptic creature. Who says short nails can’t steal the Halloween show with style and a touch of mystery?
11. Neon Mummy Accents
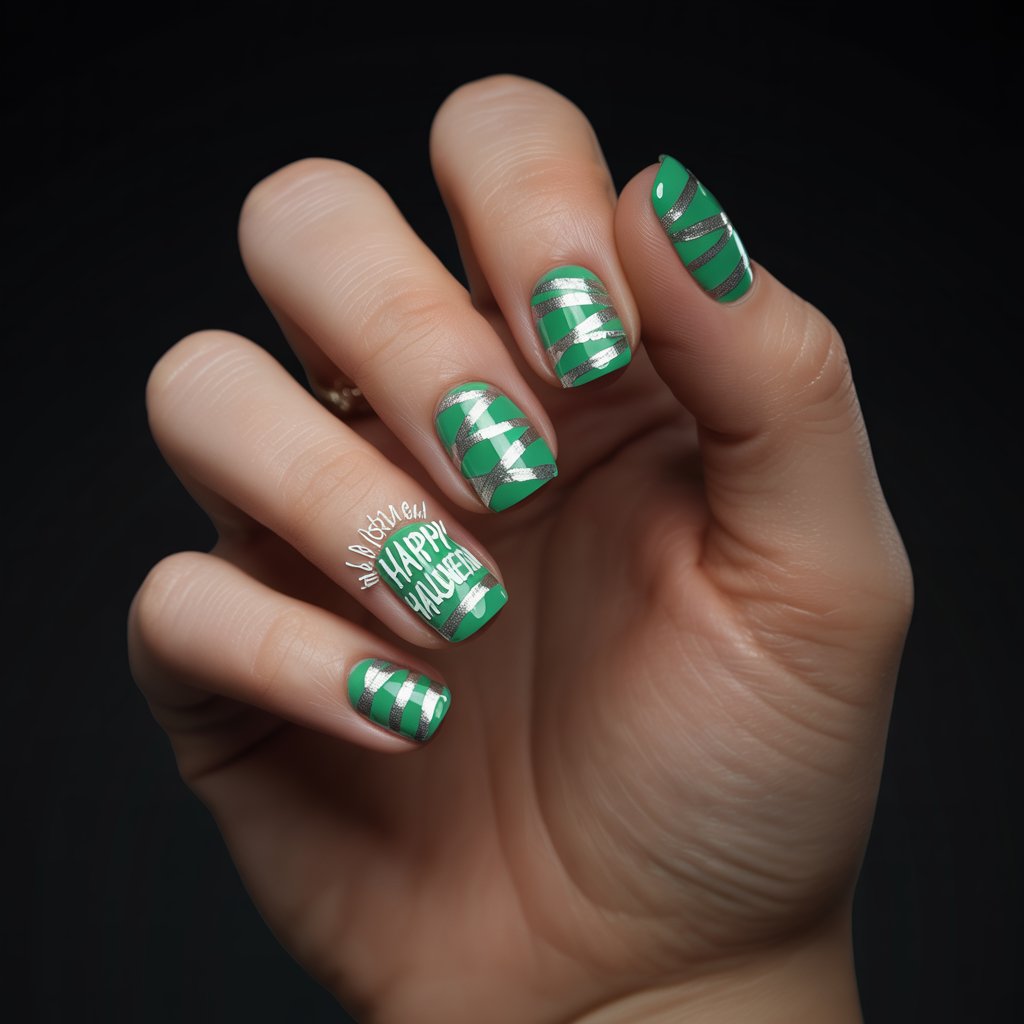
Ditch the usual soft whites and pale nudes—this Halloween, go bold or go home. Think electric green, haunting purple, or fiery orange—shades that scream spooky season in style.
These vivid tones don’t just grab attention; they resurrect your mummy nail art with an otherworldly glow. Blend bright polish with eerie details to transform your fingertips into tiny, wrapped-up showstoppers. It’s creepy, it’s chic, and unmistakably festive. Who said mummies had to be dusty and dull? Give them a modern jolt.
12. Mixed Media: Mummy + Other Halloween Characters
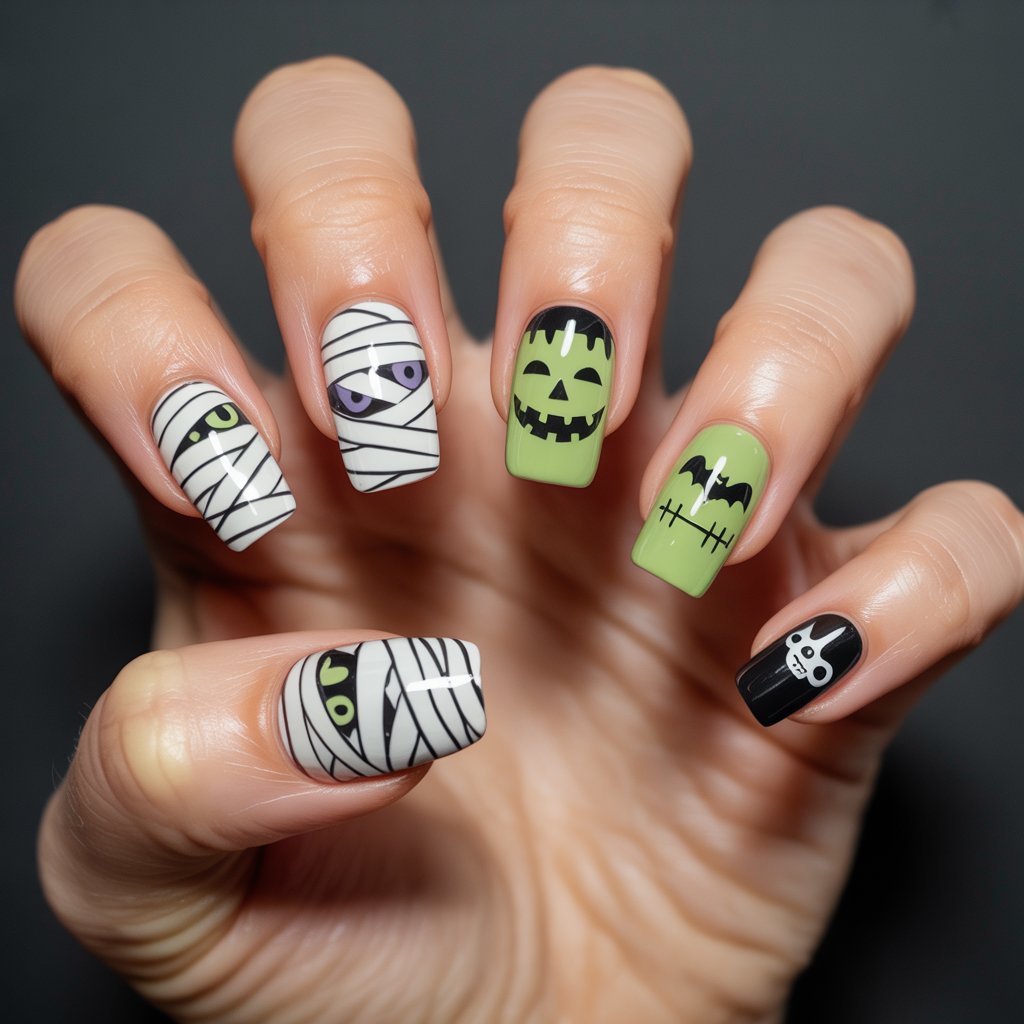
Why settle for just one spooky theme when you can mix and match? Wrap your nails in mummy-inspired designs, then throw in a few creepy classics—maybe a jack-o’-lantern grinning slyly, Frankenstein’s iconic bolts, fluttering bats, or a mysterious black cat lurking on a fingertip.
This hauntingly stylish combo creates a unified yet playful Halloween manicure that’s anything but ordinary. Expect compliments, double-takes, and maybe even a few chills. Halloween never looked so wickedly fun.
Understanding Halloween Nail Art Trends
While mummy nail art is a go-to for the season, it’s part of a larger trend of character-inspired Halloween nail designs. Popular motifs include ghosts, bats, witches’ hats, candy corn, and vampires. These nail art ideas often blend DIY techniques with embellishments like rhinestones, gel overlays, and glow-in-the-dark accents for a custom feel.
This trend is driven by creative social media users, especially across Pinterest and YouTube, where users share tips, tutorials, and checklists for achieving artful, professional-looking manis at home.
How-To: Achieve the Perfect Mummy Mani at Home
Here’s a simple step-by-step inspired by nail pros and DIY bloggers:
- Apply a base coat to protect your nails.
- Paint nails with your chosen base color (white, nude, pink, etc.).
- Use a striping brush or toothpick dipped in black (or dark) polish to draw crisscrossed, uneven lines—these are your mummy wraps.
- Use a dotting tool or toothpick to add two large dots for the eyes.
- Add smaller white/colored dots inside the black eyes for pupils (or bloodshot details if desired).
- Finish with a top coat for shine and longevity.
Frequently Asked Questions
Q: How long does mummy nail art last?
A: With a good-quality base and top coat, your mummy nails can last up to a week or longer, depending on your daily activities.
Q: Do I need special tools?
A: While a fine nail art brush helps, you can use bobby pins, toothpicks, or striping tape in a pinch for wraps and eyes.
Q: What if I’m not good at freehand nail art?
A: Use nail stickers or decals, or try a single accent nail rather than a full set of mummies for an easier, beginner-friendly approach.
Q: Can children wear mummy nail art?
A: Absolutely—consider bright colors, smiling mummy faces, and non-toxic polishes for a kid-friendly manicure.
Q: How can I personalize my mummy nails?
A: Experiment with colored wraps, add bows, make the eyes glow with neon polish, or combine with other Halloween icons for a personalized look.
Conclusion
Mummy nail art is the ultimate fusion of spooky, cute, and customizable—making it a consistent Halloween favorite among nail lovers of all ages. Whether you follow one of these twelve inspired designs or combine elements for a personalized mani, mummy nails are sure to become your Halloween go-to.