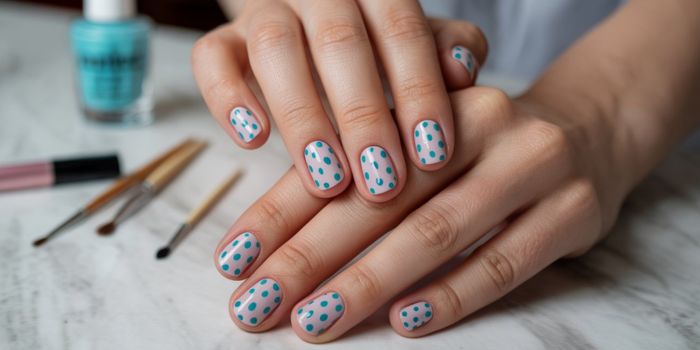
Dotticure nail art transforms manicures into playful fashion statements through the use of simple dots that enable limitless design and color variations.
This method suits both novice and expert nail artists because it demands few tools while delivering expansive creative possibilities.
This guide based on trends and expert tutorials provides detailed instructions for creating a chic dotticure at home while offering essential tips and answers to common questions to help you achieve salon-quality nails from your own space.
What Is Dotticure Nail Art?
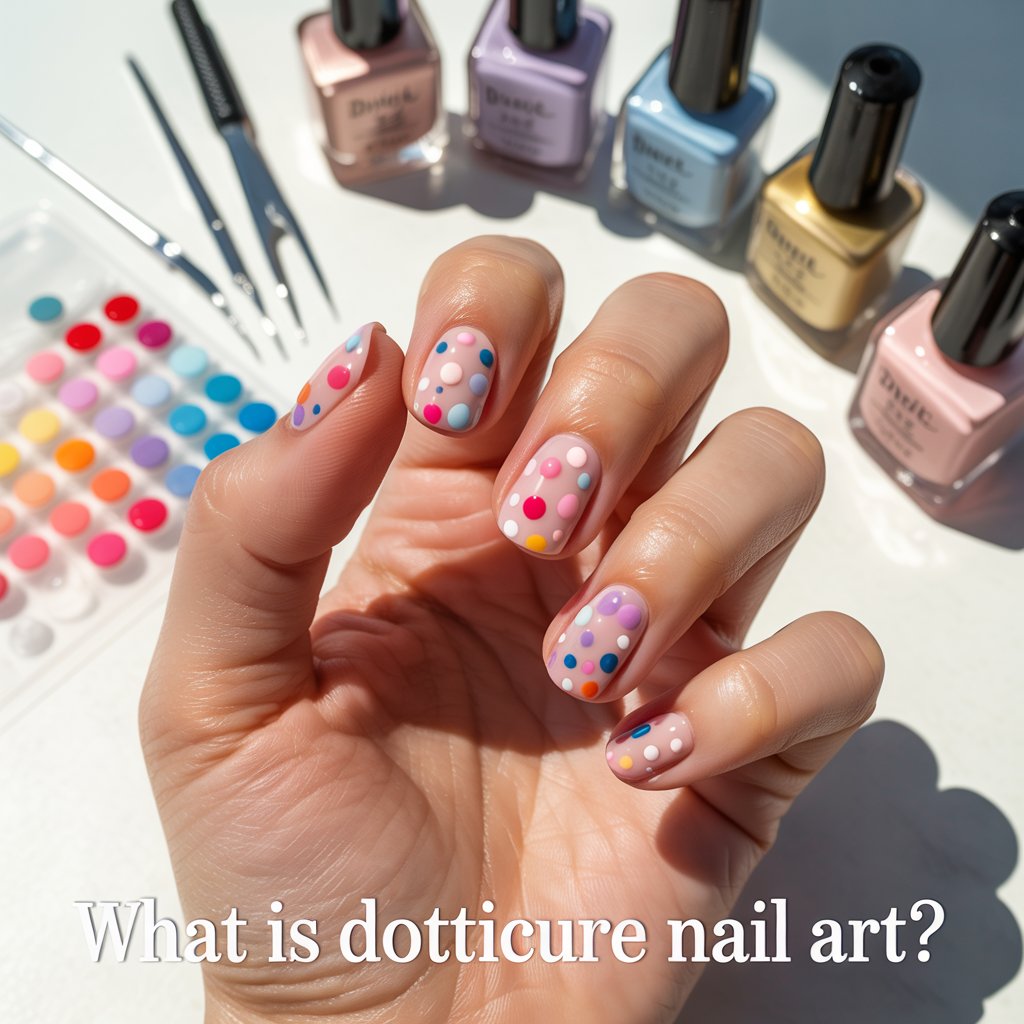
Dotticure is a nail art technique where dots of various sizes and colors are used to create patterns, accents, or even intricate designs on your nails.
The look can range from minimal and elegant to bold and colorful, depending on your choice of base colors and dot arrangements. Dotticure is loved for its versatility and ease no need for advanced skills or expensive tools, just a little creativity and patience.
Whether you want a classic polka dot, a rainbow confetti effect, or a modern ombré, dotticure lets you express your style effortlessly.
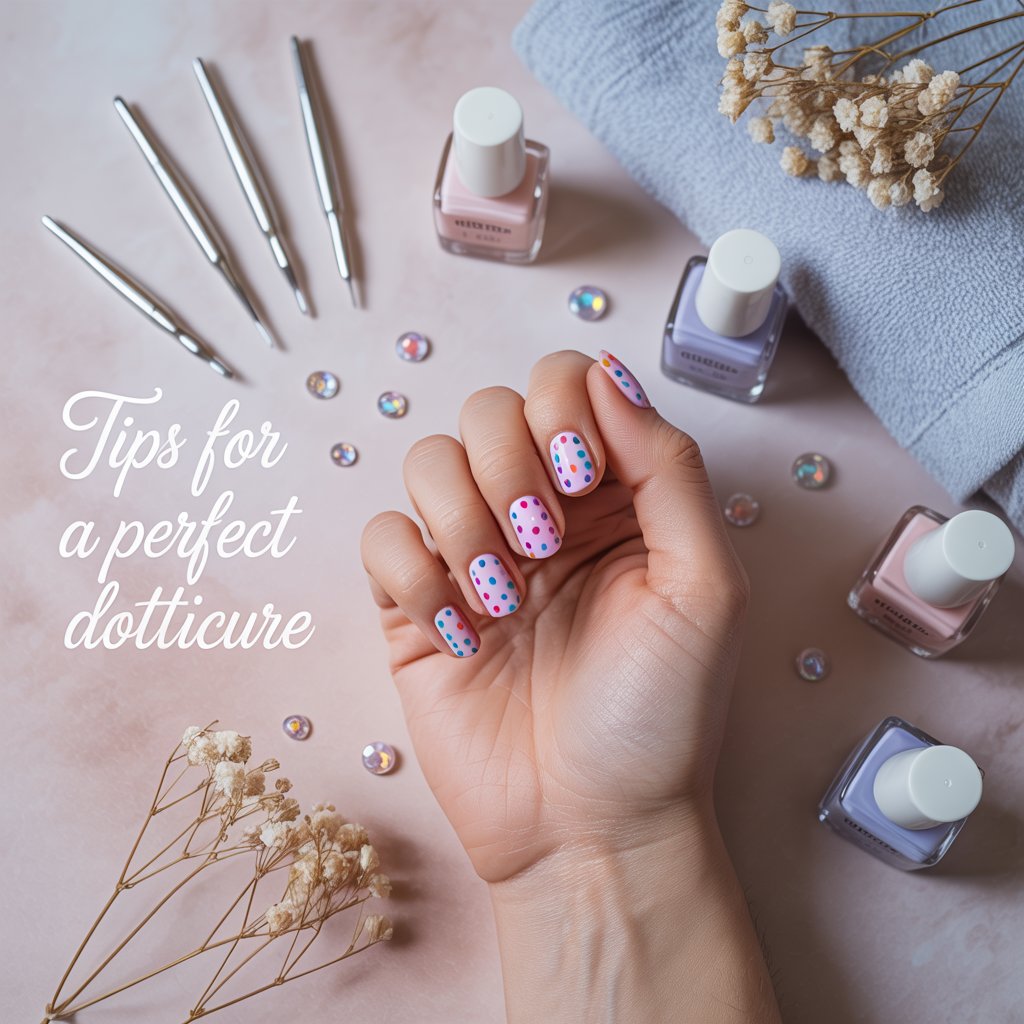
Tools and Supplies You’ll Need
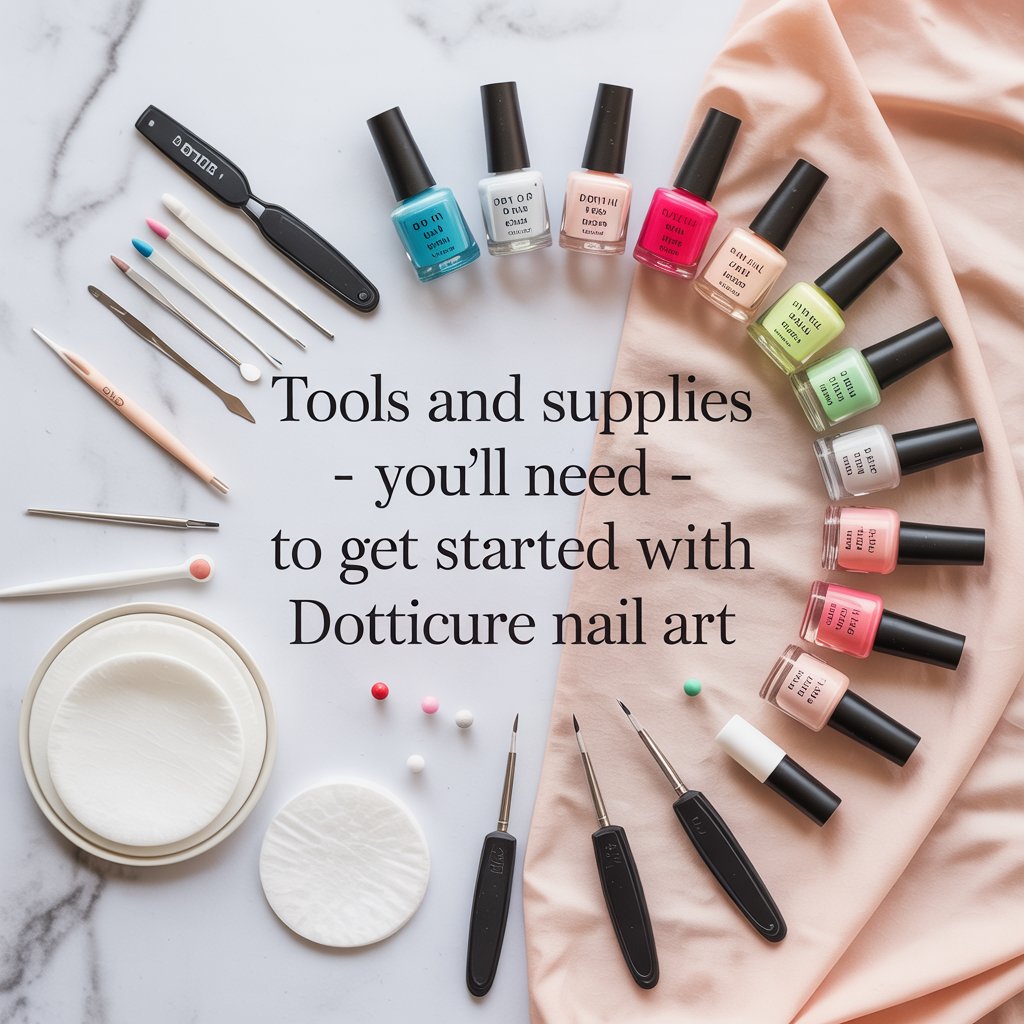
To get started with dotticure nail art, gather the following supplies:
- Base coat and top coat: These protect your nails and ensure your design lasts longer.
- Nail polishes: Choose a base color and one or more contrasting shades for the dots.
- Dotting tools: These can be purchased as a set with different sizes, or you can use household items like bobby pins, toothpicks, or the end of a makeup brush.
- Nail polish remover and a small brush: For cleaning up around the edges.
- Optional: Nail strengthener for added protection, especially if you have weak nails.
Dotting tools come in various sizes, allowing you to experiment with different dot effects. If you don’t have a dotting tool, improvising with everyday objects works just as well. Remember to clean your tools with nail polish remover after use to keep them in good condition.
Step-by-Step Guide to Creating a Dotticure
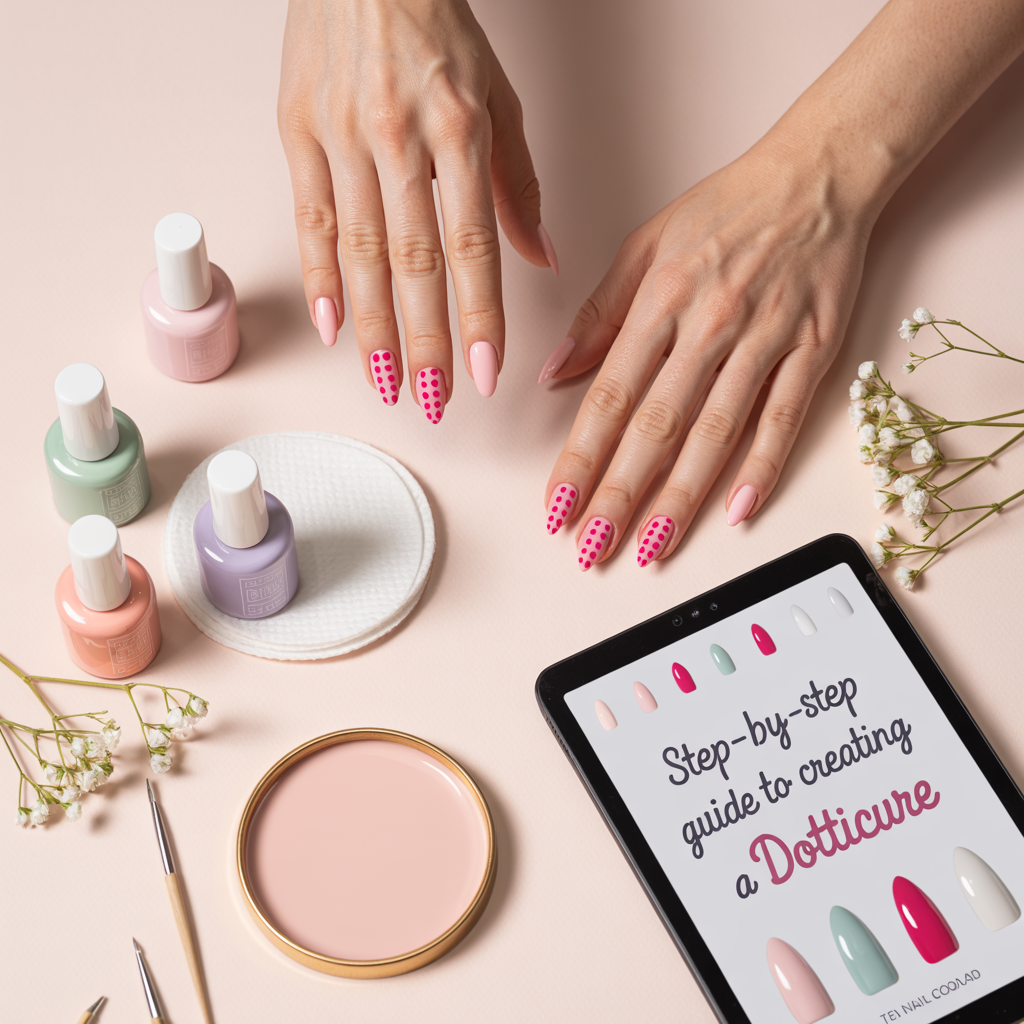
- Prep Your Nails: Start with clean, dry nails. Apply a nail strengthener if desired, followed by a base coat to protect your nails and help the polish adhere better.
- Apply Base Color: Paint your nails with your chosen base color. For a more vibrant look, use two coats and let them dry completely.
- Create the Dots: Dip your dotting tool or chosen implement into the dot color. Gently touch it to your nail to create dots. You can make patterns like straight lines, diagonals, or random placements. Try using different sizes for added dimension.
- Layer and Experiment: For more complex designs, layer dots in different colors or sizes. You can even create ombré effects or floral patterns by clustering dots together.
- Clean Up: Use a small brush dipped in nail polish remover to tidy up around your nails.
- Seal the Design: Once your dots are dry, apply a generous layer of top coat to protect your art and add shine. Let your nails dry completely before using your hands to avoid smudging.
Tips for a Perfect Dotticure
- Let Each Layer Dry: Patience is key. Allow your base and each layer of dots to dry before adding more to prevent smudging.
- Practice Dot Placement: If you’re new to dotticure, practice dotting on a piece of paper to get a feel for spacing and pressure.
- Mix and Match Colors: Don’t be afraid to experiment with bold color combinations or subtle pastels for different moods.
- Use a Steady Hand: Rest your hand on a flat surface for more control when dotting.
- Clean Tools Between Colors: Wipe your dotting tool clean before switching colors to keep dots crisp and vibrant.
Inspired Dotticure Ideas
Pinterest is a treasure trove of creative dotticure designs. Some trending styles include:
- Rainbow Confetti: Use a different color for each dot, scattered randomly for a playful, party-ready look.
- Monochrome Chic: Stick to one color family for a subtle, sophisticated effect.
- Accent Nails: Apply dots to just one or two nails for a minimalist take on the trend.
- Geometric Patterns: Arrange dots in lines, triangles, or X-shapes for a modern vibe.
- Ombre Dots: Start with large dots at the base and gradually use smaller dots toward the tip for a gradient effect.
Browse Pinterest boards and nail art blogs for endless inspiration and adapt designs to suit your style and skill level.
Conclusion
Dotticure nail art is one of the easiest and most versatile ways to express your creativity at home. With just a few tools and a bit of imagination, you can create endless stylish looks that rival salon manicures. Whether you prefer classic polka dots or bold, Pinterest-inspired patterns, dotticure is a fun way to make your nails stand out. Remember to take your time, experiment with colors and patterns, and most importantly, enjoy the process.
Frequently Asked Questions
Q: Can I do dotticure without a dotting tool?
A: Absolutely! You can use household items like toothpicks, bobby pins, or the end of a makeup brush to create dots. Just make sure to clean them between colors for best results.
Q: How do I prevent smudging my dots?
A: Allow each layer to dry completely before adding more dots or applying top coat. Use a quick-dry top coat and be gentle when brushing it on.
Q: What are some good color combinations for dotticure?
A: Try classic black and white, pastel rainbows, bold neons, or metallic accents for different effects. Pinterest is a great place to find trending color combos.
Q: How long does a dotticure last?
A: With a good base and top coat, your dotticure can last up to a week or more, depending on your daily activities and how well you care for your nails.
Q: Can I do dotticure on short nails?
A: Yes! Dotticure looks great on all nail lengths. You can adjust the size and placement of the dots to suit your nail shape and size.